
No stand mixer, no knead, no special equipment required. These No Knead Dinner Rolls are perfectly soft and fluffy and are astonishingly effortless to make. Just combine the ingredients in a bowl and mix with a wooden spoon – that’s it! It’s the easiest recipe for bread rolls in the whole world!
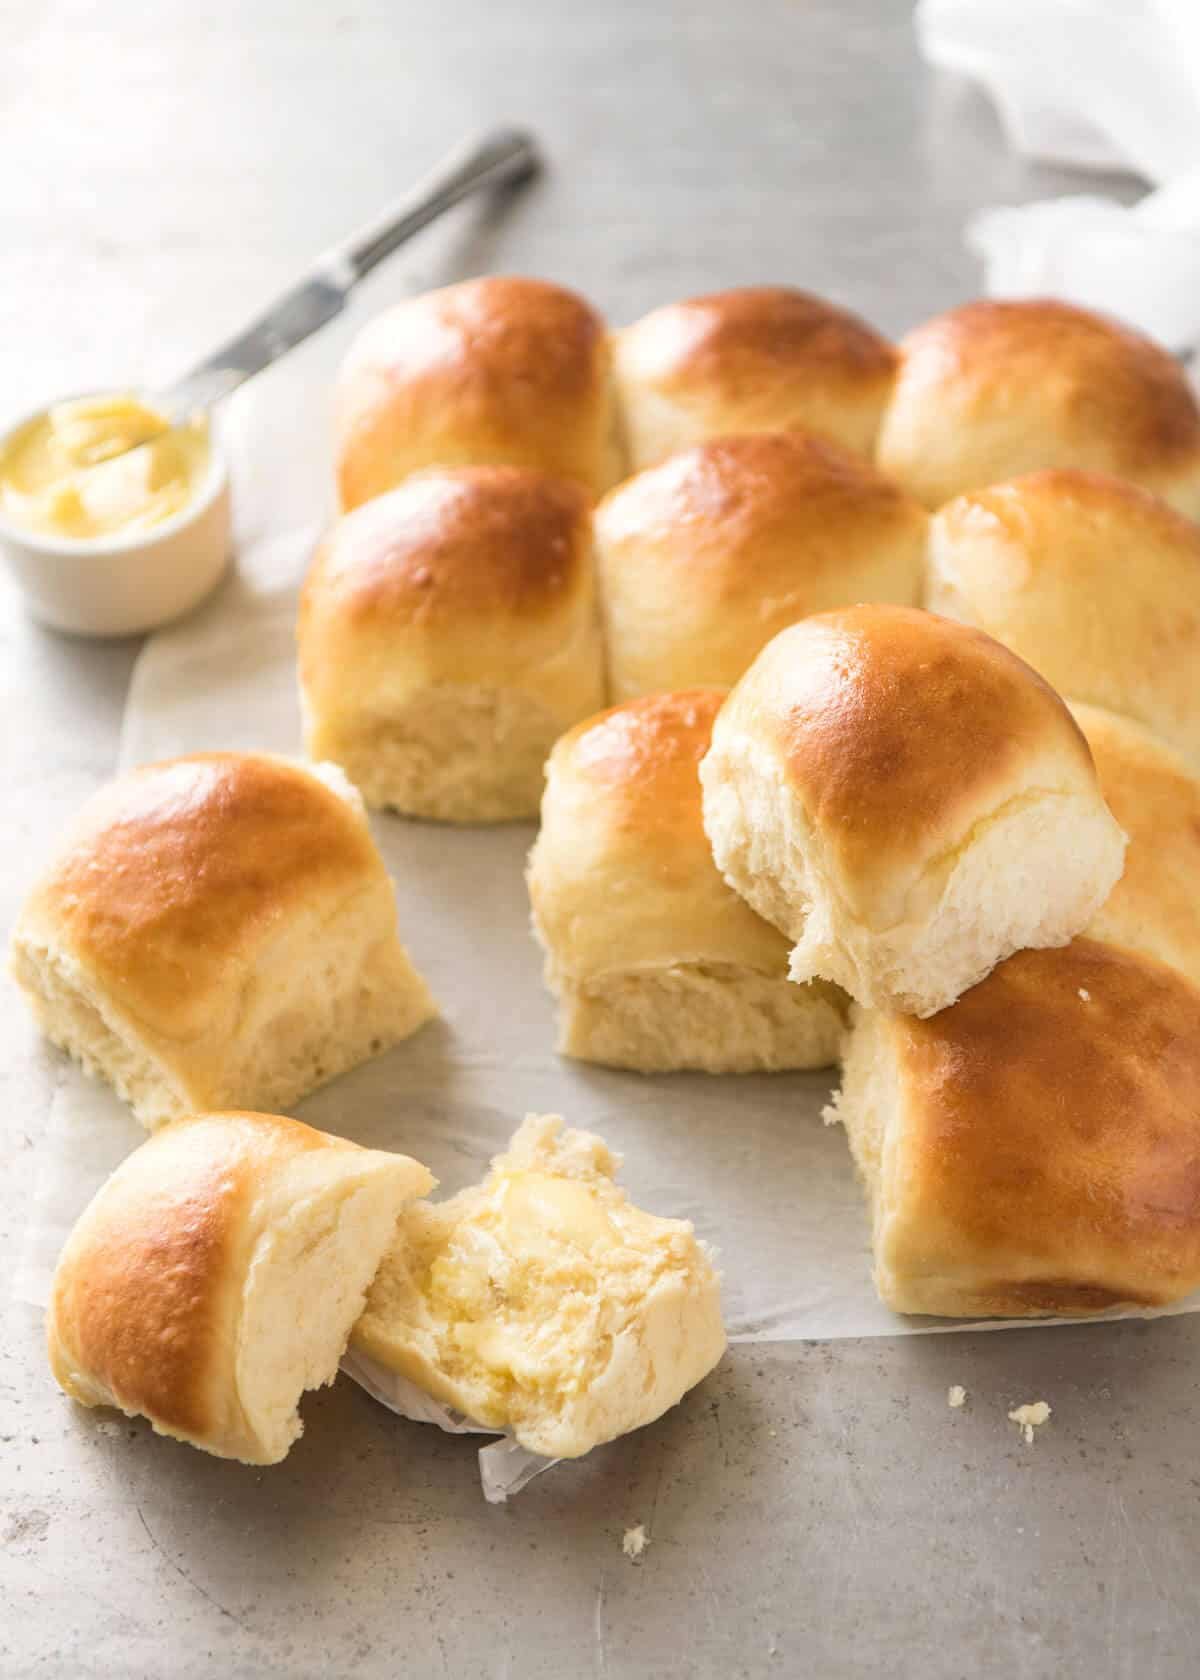
This recipe for bread rolls will blow your mind!
These dinner rolls are:
made without kneading;
without a stand mixer or any other electric appliance;
take 2 minutes of active effort to mix the dough;
have golden tops and are soft and fluffy on the inside.
Every single time I make these, I am in utter awe of how effortless they are, and how amazing they taste. They are in every way just as good as classic dinner rolls, made by kneading the dough by hand (tired arms, tired arms!) or using a stand mixer.
I truly believe to my very core that only those with a refined palette and/or baking experts can tell the difference between these No Knead Dinner Rolls and traditional kneaded-tired-arms dinner rolls!
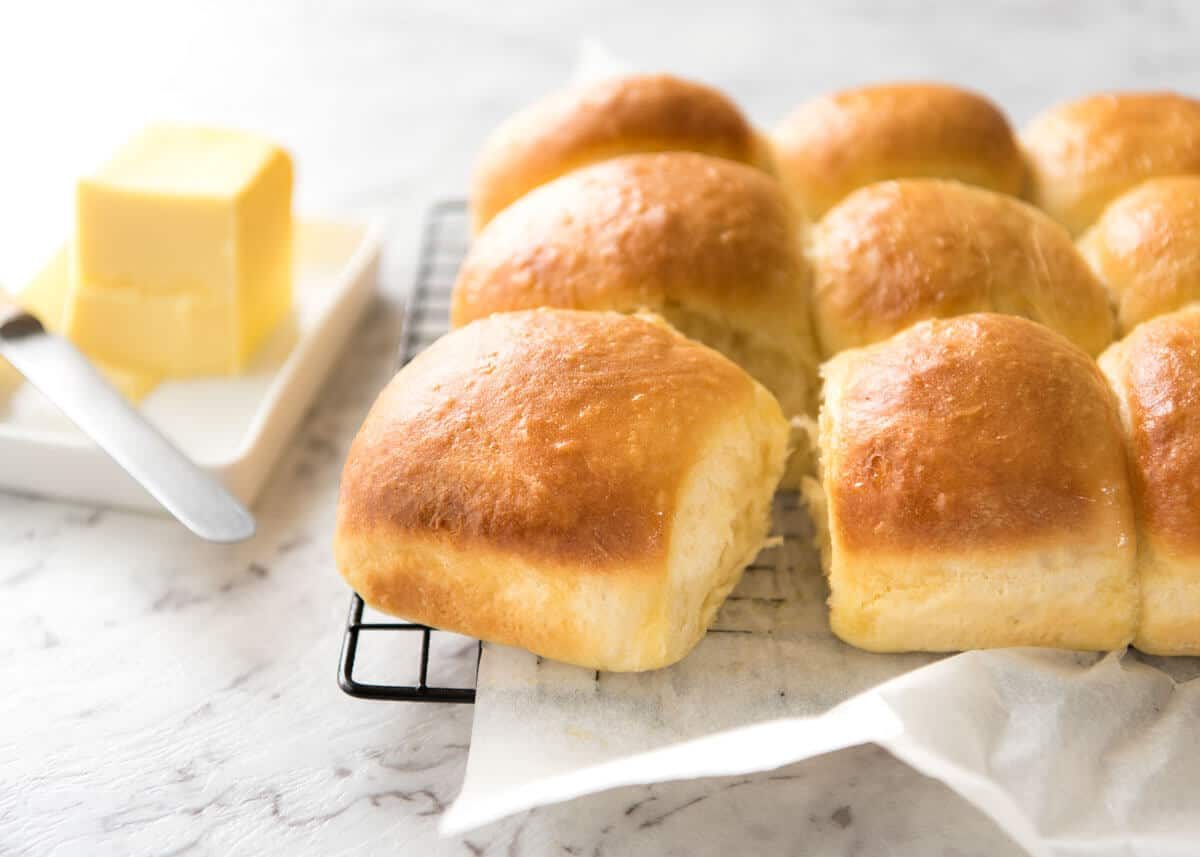
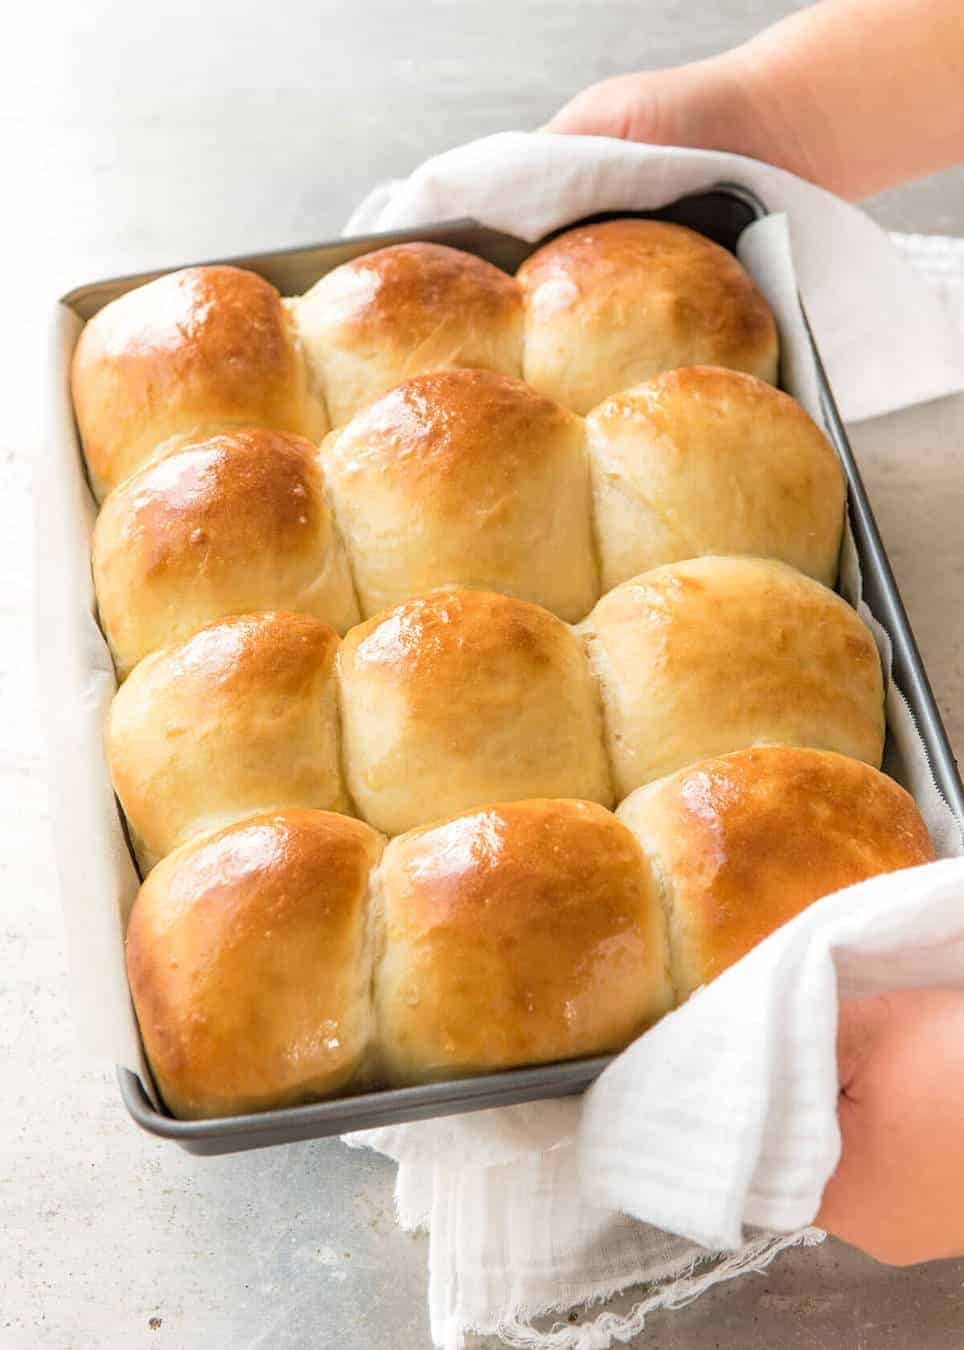
See how soft and fluffy they are??
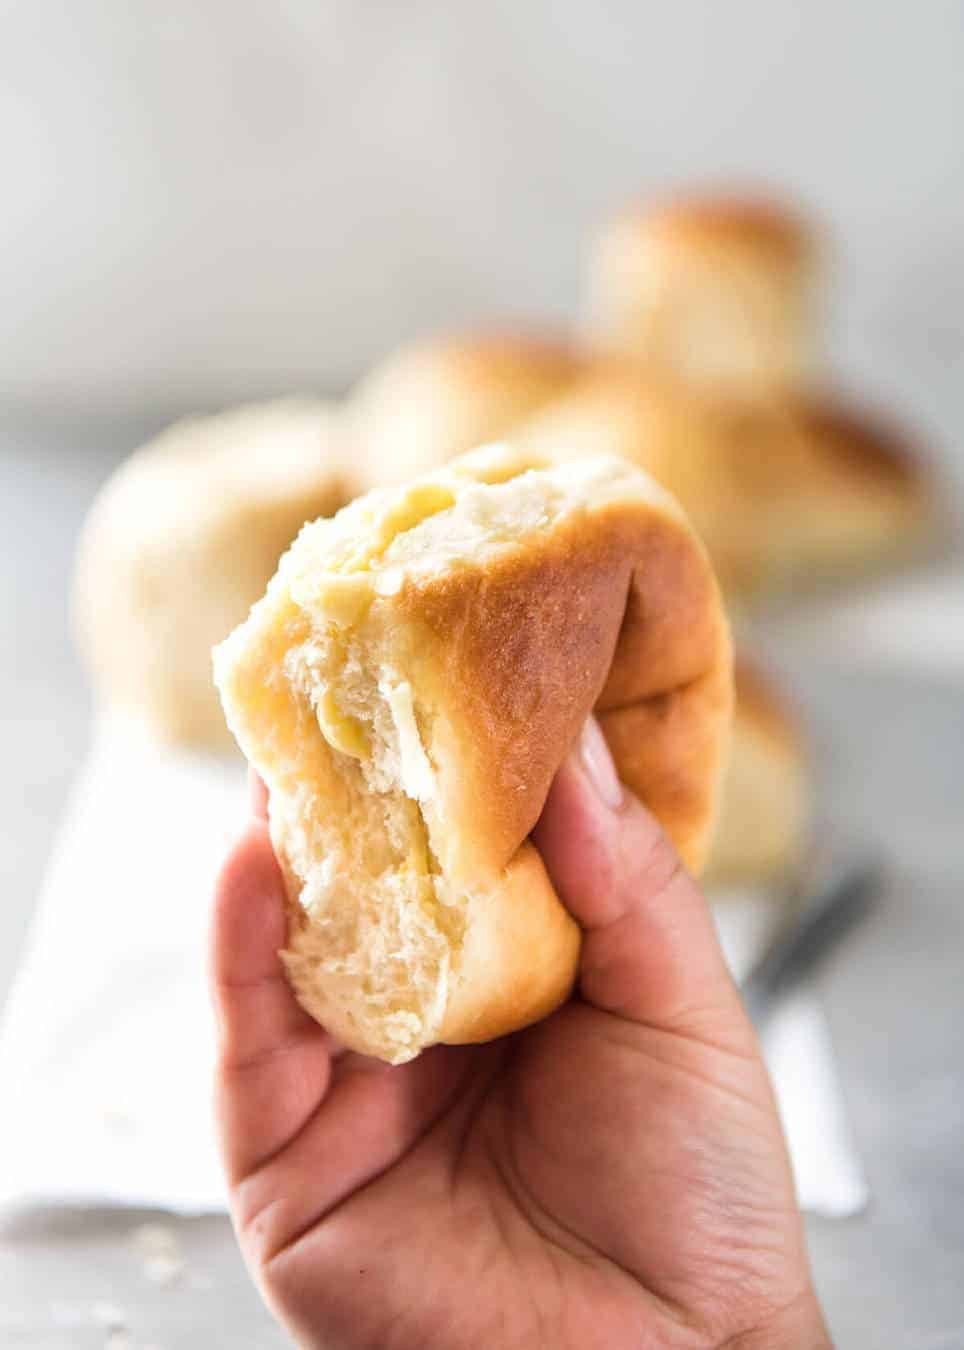
Kneaded vs No Knead Dinner Rolls
In the interest of being completely open and honest, here are the differences that I notice between kneaded dinner rolls and these No Knead Dinner Rolls:
The kneaded rolls stay a wee bit more moist for longer. ie. they are slightly better the next day compared to the No Knead ones. But actually, homemade bread, muffins etc, being preservative free that they are, are always best consumed fresh so I don’t see this as a major disadvantage. Neither the kneaded nor No Knead rolls are great the next day. They lose their moisture and both need to be warmed up before serving to make them moist again. It is just that with the kneaded ones you could possibly get away with not warming up (but they aren’t great), whereas the No Knead ones definitely need warming up;
Kneaded rolls rise a wee bit more. Not noticeable for normal people, and you’d never say the No Knead ones aren’t soft and fluffy. They are, they really are. It’s just that the kneaded ones rise a touch more with the same amount of yeast.
I’m so convinced of the merits of no-knead breads however, that I have since posted No-knead Artisan Bread and Focaccia – both spectacular loaves in their own right that don’t require single minute of kneading!
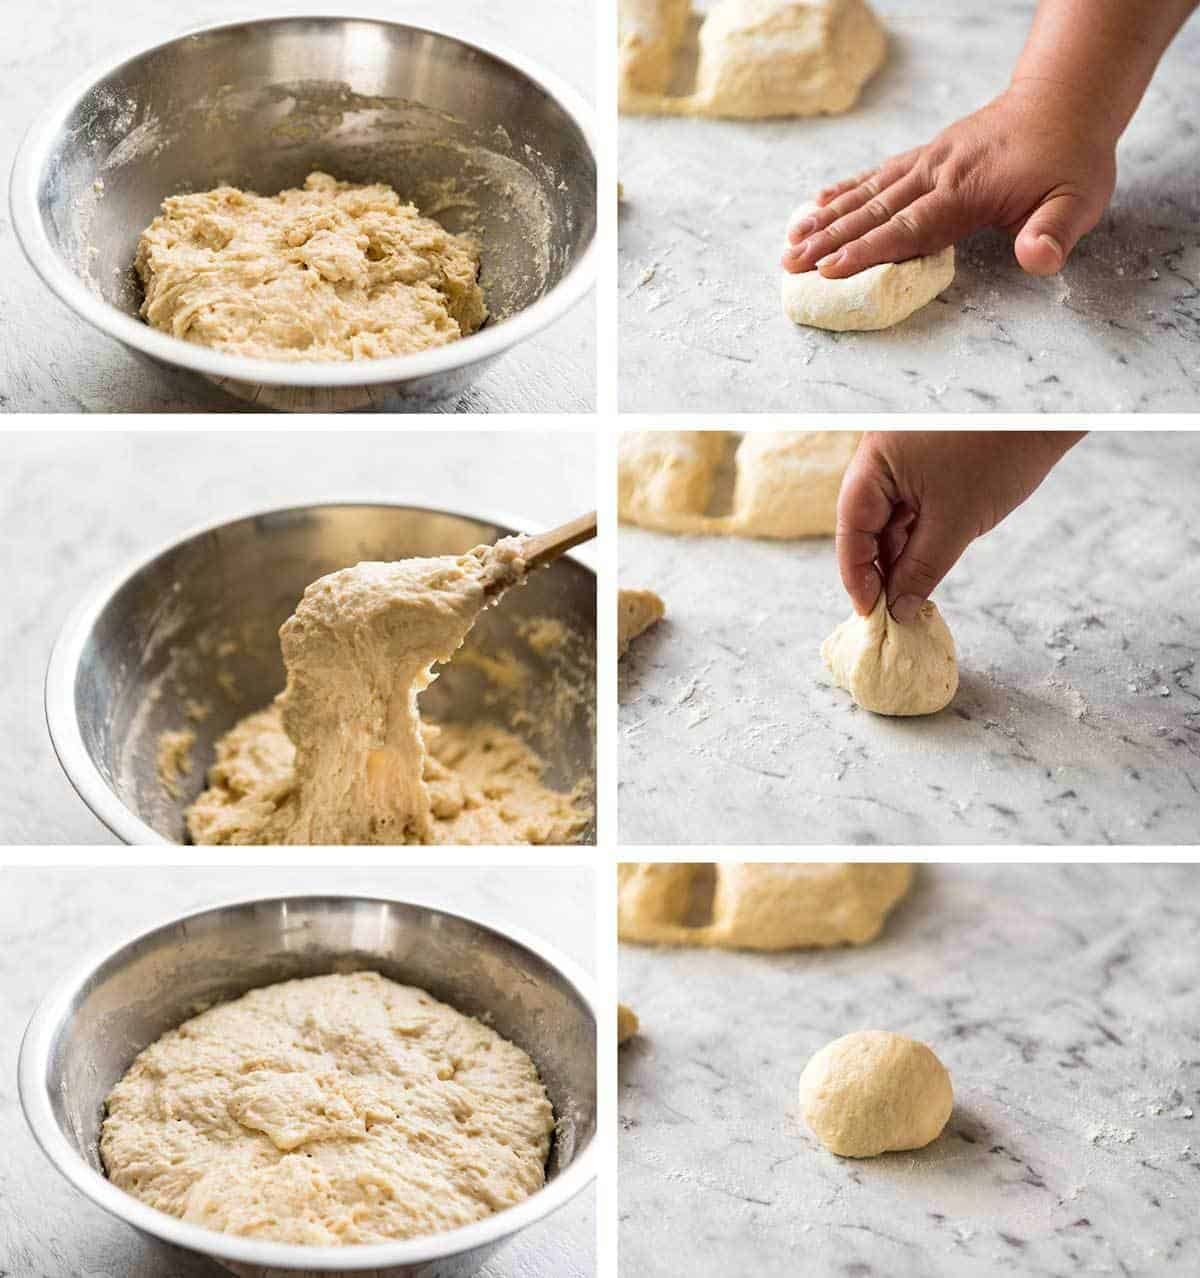
Dump-and-mix NO KNEAD Dough
In terms of the prep, the batter is literally a dump-and-mix job. There is a major difference in rise time compared to kneaded dough which can rise in 30 – 45 minutes for the 1st rise, then around the same for the 2nd rise after forming the rolls. For these No Knead Dinner Rolls, the dough is much wetter than kneaded dough, so it takes longer to rise. 1.5 – 2 hours, depending on how warm it is where you are. If you use my ridiculous-but-effective tip of rising the dough in your (empty! warm!) dryer, it takes 1.5 hours. 🙂 (See recipes notes for details)
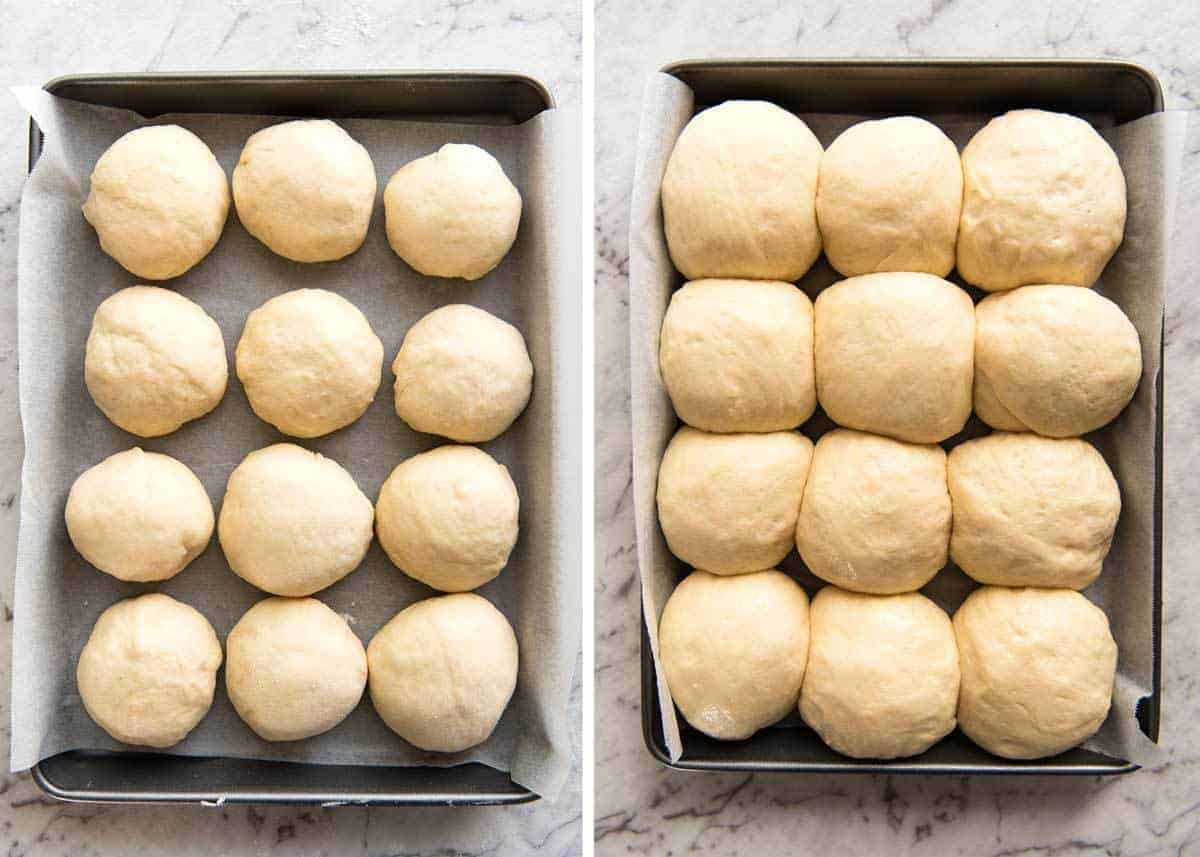
You can see in these photos how different the dough is compared to traditional bread dough. It’s not knead-able, it’s way too sticky. It’s almost more like a muffin batter!
Quick little tip: To get a beautiful golden surface, the dough needs to be rolled tightly and smoothly into balls. With sticky dough, this is tough to do. So here’s my work around: Press the dough down lightly, then bundle it up like a money-bag (mmm…Thai Money Bags…). Flip it over and you have a nice smooth surface with the dough stretched tightly = smooth golden surface. I demo this in the recipe video too (below recipe).
Make-ahead and bake on demand
Another big bonus for these rolls: you can roll the dough into rolls then refrigerate overnight (uncooked) and bake them fresh when you’re ready to serve! It’s quite amazing actually, I wasn’t sure it would work but it does.
Easter is coming up! That’s why I decided to squeeze these in so soon after sharing Hot Cross Buns (which you can make using this No Knead technique, the recipe is in that post). I know some people think baking with yeast is daunting. But I swear to you, watch the video. See how soft and irresistible these rolls come out. And be prepared to be blown away by how easy these are to make!
Carb Monsters unite! – Nagi xx
More No Knead Breads & Flavour variation options!
Cheese and Bacon Rolls (use this no knead dough for that recipe)
WATCH HOW TO MAKE IT
No Knead Dinner Rolls recipe video! No laughing at the Baby Hands – you’ll cop a serious eyeful in this video!
Hungry for more? Subscribe to my newsletter and follow along on Facebook, Pinterest and Instagram for all of the latest updates.

SOFT NO KNEAD Dinner Rolls
Ingredients
Buns:
- 1 tbsp dry yeast (Note 1)
- 1/4 cup caster/superfine sugar , or sub with normal white sugar
- 1/2 cup warm water (Note 2)
- 4 cups bread flour + extra for dusting (Note 3)
- 1 1/2 tsp salt , cooking/kosher salt
- 1 cup milk, lukewarm, whole or low fat, (Note 2)
- 50g / 3 1/2 tbsp unsalted butter , melted and cooled
- 2 eggs , at room temperature, beaten with fork
Brushing:
- 1 tbsp butter , melted
Instructions
- Place the yeast and 2 teaspoons of the sugar in a medium bowl, then pour in water. Leave for 5 minutes until it froths.
- Place flour, remaining sugar and salt in a bowl. Mix to combine.
- Make a well in the centre. Add milk, butter, eggs and pour in the yeast liquid, including all froth.
- Mix until combined with wooden spoon – it will be like a thick muffin batter. Not pourable, but thick and sticky.
Rise #1:
- Leave dough in the bowl, cover with a wet (clean) tea towel and place in a warm place (25C/77F+) to rise for around 1 1/2 – 2 hours or until almost tripled in volume. See Note 4 for how I do this (you will laugh – but it works every time!). Dough surface should be bubbly (see video or photos in post).
Forming Balls (watch video, it’s helpful):
- Line a 31.5 x 23.5 cm / 9 x 13″ tray with baking paper with overhang.
- Remove tea towel and punch dough to deflate, then mix briefly in the bowl to get rid of the bubbles in the dough.
- Dust work surface with flour, scrape dough on work surface. Dust top of dough then shape into a log. Cut log into 4 pieces, then cut each piece into 3 pieces (12 in total).
- Take one piece and press down with palm, then use your fingers to gather into a ball, flip (so smooth side is up) then roll the dough briefly to form a ball. This stretches the dough on one side and that’s how I get a nice smooth surface on my roll. (For this step, use as much flour as needed to handle dough and avoid piercing inside into the wet dough)
- Place the ball with the smooth side up on the tray. Repeat with remaining dough. Line them up 3 x 4.
Rise # 2:
- Spray surface of rolls (or cling wrap) with oil (any), then place cling wrap over the tray.
- Return tray to warm place and leave for 30 – 45 min, until the dough has risen by about 75% (less than double in size).
- Partway through Rise #2, preheat oven to 200C/390F (standard) or 180C/350F (fan/convection).
- Bake for 15 – 18 minutes, or until the surface is a golden brown and the roll in the centre sounds hollow when tapped. The surface colour is the best test for this recipe.
- Remove rolls from oven. Brush with melted butter.
- Use overhang to lift rolls onto a cooling rack. Allow to cool to warm before serving.
Recipe Notes:
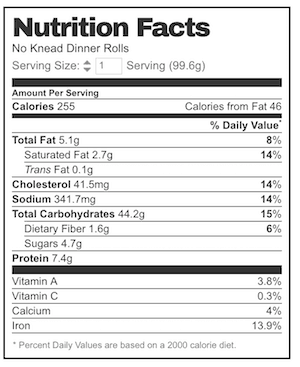
Nutrition Information:
LIFE OF DOZER
When he got sent to the naughty corner and he was wondering whether he was allowed back in….

Great recipe but I put in 1and a half teaspoons of salt and it was misleading, think it should have been just a half whoops! They were still lush and easy to make
Hi Karen! 1 1/2 tsp of salt is right! N x
can these be make into hamburger buns
YES!!!
Hi can I make this without eggs please…am a vegetarian
Wow! I rarely comment, but these were so easy and extraordinarily good. I followed your recipe exactly, to include the measurements by weight. The only addition I made was to brush the rolls with melted butter mixed with rosemary and garlic powder and sprinkle on some kosher salt, right before baking.
These were a delight with sausage lentil soup. Delicious!
I’m so pleased to hear that L!! Thanks for sharing that! N xx
I didnt read all the notes and put only 4cups of flour :/ hope for the best !
I made these twice both times the rolls turned out flat. What am I dong wrong?
I usually don’t have much success with yeast rolls, but these were great! I found the dough to be quite wet and was afraid to keep adding extra flour. I ended up making smaller rolls (17 in all) since these seems too large for one person to eat. Since the dough was too wet to handle much, I ended up just plopping the rolls in the pan wet and let them rise. Not to worry; the rolls rose nicely and the tops smoothed out. They looked great when baked, and I ate two at a time. Great flavor and texture! Thanks for the easy peasy rolls (except for sticky fingers when trying shaping, lol.)
Made these tonight and they were fabulous! Cannot believe how easy and the texture was incredible. So good thank you for a great recipe.
I think the Baby Hands in the video are amazing. This child is destined for culinary greatness.
Hi There , can I bake there in a glass pyrex pan
Yep you sure can!
Awesome recipe! First time I tried bread and it was a hit. Made it twice already (just this afternoon was the second time). Can’t wait to try the cinnamon rolls
That’s so great to hear Abi! Thanks for letting me know – N x ❤️
I live in Honduras and wanted to let you know my experience with living in the tropics and rising time variations. I threw everything in the bread machine and let the machine do the mixing for a few minutes and then unplugged it. The machine warms when you start a cycle so it was warm enough to let it rise in there. Possibly because I live in the tropics, It had risen to almost over flowing in about 30 minutes. Like you noted in humidity the dough was more wet. I poured it onto floured surface and start the dividing and rolling only using enough flour to handle. I set them to rise for 20 minutes over the warming oven. Baked at 375 for about 15 minutes. They turned out just like the photos and were a highlight of dinner.
Made these for Christmas dinner last evening. The whole family enjoyed. They are so good, they are replacing our usual roll recipe from now on!! Recipe is easy and so simple to follow for even a part time baker person. As a matter of fact, they’re being made again right now (Rising as I type). Thank you for sharing. Next time thinking of making your cinnamon rolls. 🙂
Great roll for so little effort.
Video made written recipe very clear.
Thanks!
OMG! I want to make this for later but I have no instant yeast. I only have the active dry yeast that I just bought for the no knead bread crusty bread.
I’m getting up to start my rolls for a Christmas gathering. Because I can never leave well enough alone, (I’ve made these a few times b4 and they’re always a hit)I’m wondering if I can add ingredients to this bread (ok, shredded cheese 👀). I would be adding it b4 the first rise.
Can’t wait to make this for Christmas! BTW, as a fellow carb, cheese monster, if I could choose who I wanted to be with on a deserted island, it would be you!
😘 Merry Christmas Hedy!! N xx
If I’m doing these into crescent rolls, how thick should I roll the dough?
Around 1/10″ thick 🙂
If making ahead of time do you roll dough then refrigerate?
Hi Michelle, please see recipe notes for refrigeration directions! 🙂
I’d like to make these for Christmas. Can you substitute a nut milk for regular milk? I have a dairy allergy in the house. She can have butter but no other milk products.
Hi Teri! I am pretty sure that will be fine, I have a memory of another reader having the same problem 🙂 N x
Have made these rolls twice now. A dozen per the recipe at Thanksgiving, and then yesterday doubled the recipe and reduced the size of the rolls by half, making 48 rolls, for holiday party mini-sandwiches with ham and smoked turkey. Both times, the rolls have been a hit. My only suggestion is a tiny one: in the ingredients list where caster sugar is listed, to note ‘separated’ there. (The first time I made the recipe at Thanksgiving, I very closely followed the recipe and picked up on only 2 teaspoons of sugar for the yeast mix. Yesterday, I was blazing along at warp speed and added ALL of the sugar at once to the yeast mix, only realizing my mistake when I got to the dry ingredients. Fortunately, I had just enough dry yeast to start over.) Otherwise, LOVE, LOVE, LOVE. This recipe and the rolls.
That’s so great to hear Susan! Thanks for letting me know – N x ❤️