
I want to rave about the rich, savoury filling of this Chicken Mushroom Pie, but all anyone can talk about is the Duchess Potato topping…..😅 Fluffy and buttery inside with crispy parmesan crusted ridges, I want to pick them off one by one and eat them all by myself!

A chicken mushroom pie like no other!
This is a pie with a lid like no other. We are talking fluffy, buttery swirls of mashed potato piped into mounds – Duchess Potato style – drizzled with butter and baked until golden, crusted with parmesan.
The peaks and ridges are crispy, the inside is fluffy and creamy, and the underside soaks up the rich sauce of the pie filling underneath. It’s basically a fancy potato crown for your pie……
Sorry puff pastry! You’ve been dethroned!

As for what’s underneath? A rich pie filling with big juicy bites of chicken and mushroom with a deeply savoury dark brown sauce that tastes like you’ve been slow cooking for hours rather than 15 minutes.
It’s definitely a cut above your regular chicken pie. In fact, it was originally christened an Extra Good Chicken Mushroom Pie (go on, have a giggle and mock my lack of creative writing skills!). I had planned to tell you the little extra things I do to make it extra good: Guinness beer for instant depth in the sauce (think – Guinness Stew!), searing chicken pieces whole rather than chopped for better colour (which equals flavour), and using beef rather than chicken stock for a darker, deeper flavoured sauce.
Little things – but they make such a difference!

PS You’ll feel like you’re decorating a cake when you pipe the mash. It’s oddly satisfying / amusing.


Ingredients for Duchess Potato Chicken Mushroom Pie
If you make the mistake of adding up the total butter in the recipe (I am not going to do the maths for you), just a reminder that we’re making an extra good pie here. 🥰 If you really want need to cut back (doctor’s orders are just about the only acceptable reason), you can use oil spray instead of butter to sear the chicken and spritz the surface of the potato, and skip the second dab of butter in the mushrooms.
Just don’t skip the butter to make the roux, else you risk lumpy sauce. 🙂
1. CHICKEN FOR THE PIE
I prefer to use chicken thighs rather than breast, for juicier bites of chicken. Though, this is still very nice made with breast (it won’t overcook), I just think it’s better with thigh.

2. PIE FILLING SAUCE AND OTHER STUFF
Here’s what you need for the other pie add-ins and the sauce:

Guinness beer – This is the secret ingredient that makes Irish Beef Stew one of the greatest in the world, giving the sauce a rich, dark brown colour and beautiful depth of flavour. It doesn’t taste beery at all because the alcohol is cooked out. Cans here in Australia are 470ml (16oz) so you’ll get two batches of this pie plus a few swigs for yourself out of a can (freeze leftover beer, it’s fine to use flat in cooking).See FAQ for gluten-free option making this with wine instead of beer.
Beef stock – The other liquid for the sauce. Beef rather than chicken stock (the usual choice when cooking with chicken), for a darker brown sauce with deeper flavour.
Bacon – Thick cut streaky works best so you end up with nice pieces throughout the stew. The finely cut slices (which tend to be the more artisan style bacon) will work but they are a bit too delicate for a stew situation – they curl and break.
Mushrooms – This is the main vegetable in this pie so we’re using a good amount, 500g/1lb in total. I love the pops of juiciness they bring into the filling, and how they are a sponge for sauce. Substitute with carrots, celery and peas (pie favourites!)
Garlic and onion – Flavour base for the sauce. I like to cut the onion larger than usual – either 2.5cm/1″ squares or thick wedges – I just think it looks nicer in the sauce than having a gazillion tiny little diced pieces.
Thyme – Classic herb choice for this sauce, also used in Guinness Stew.
Flour – Thickens the sauce. Just regular plain/all-purpose flour. See FAQ for gluten-free option.
Tomato paste – Just 1 tablespoon thickens the sauce slightly and adds a touch of acidity to cut through the savouriness of the sauce. It was a late addition, and it’s definitely a more balanced sauce with it.
Butter – For cooking the mushrooms, chicken and making the roux (each cooked separately in this extra good pie recipe 🙂 ). You can cut down if using other vegetables that don’t absorb oil (like carrots) and use oil spray instead for browning the chicken. But you need the butter for the roux (ie the step when you mix flour in) as you need a minimum amount of fat else you’ll end up with a lumpy gravy.
3. DUCHESS POTATO TOPPING
And lastly, here’s what you need for the Duchess potatoes lid for this magnificent pie! Potatoes, butter and milk for the creamy mash, then parmesan (store bought grated works best) and extra butter for drizzling for the topping.

Potatoes – Starchy potatoes, rather than waxy, are best, so the inside of the duchess potato swirls are fluffy inside with a light crust on the surface. Australia – Sebago are ideal (those dirt brushed potatoes we get “everywhere”). US – Russet, and UK – King Edward or Maris Piper are perfect. Or any other starchy potatoes – Dutch creams, King Edwards or red delight.
Parmesan – News flash! Store bought grated parmesan (the sandy type) works better here as it seems to nestle in the crevices better than finely grating your own. I find that grating my own is so light, like delicate snow flakes, you can end up with a layer that sits on top of the ridges of the swirls which bakes up like a thin parmesan crisp rather than melting inside the ridges. (Am I really still writing about this? BUT THESE LITTLE DETAILS MATTER TO ME! #ThatCrazyHomeCook 😅)
How to make Duchess Potato Chicken Mushroom Pie
The order of cooking really matters here. Sear the chicken first and you’ll end up with a burnt pan before you even start the sauce. Cook mushrooms with the onion and they just go watery without browning. And if you don’t reduce the Guinness before adding flour, the sauce tastes too beery because we’re not slow cooking for hours like we do Irish Guinness Stew.
So no, it’s not a quick throw-it-all-in-and-go recipe. But if you want a really good chicken pie, you’ve got one right here. 🙂
1. Filling
Use a large, deep, non stick pan. Mine is 30cm/12″ wide – this one (shop around, I got mine for around $80, and no, that’s not an affiliate link!).

Garlic butter mushrooms first – Melt butter on high heat, add mushrooms and stir for 3 – 4 minutes until lightly coloured but still firm – they will finish cooking in the sauce. Add a bit more butter, melt, toss to coat, then add garlic, salt and pepper. Cook 20 seconds until garlic is golden, then transfer to a bowl, scraping out all the garlic bits (or they’ll burn).💡Adding the butter at the end is my trick for getting that rich buttery flavour on mushrooms without needing loads of butter at the start. Mushrooms are sponges for fat!
Golden seared chicken – Season with salt and pepper then sear until nicely golden on both sides (~2 minutes). The chicken should still be raw inside – we finish cooking it through later. Once cool, cut into large 2.5cm/1″ pieces (I do this while the sauce is simmering).💡Searing whole gives better colour and flavour than chopped – both on the chicken and in the sauce (thanks to all those golden pan bits – fond!).

Bacon and onion – Lower the heat slightly so golden bits stuck on the base of the pan don’t burn. Give the bacon a head start – cook for 20 seconds, then add the onion and cook until it’s starting to soften (~ 2 minutes). Add garlic and cook for another 20 seconds until golden.
Deglaze with Guinness – Add the beer, turn heat up to high and simmer rapidly while you scrape the base of the pan to loosen any bits stuck on it. Simmer until reduced by about 75% – this will cook out the alcohol and beeriness, leaving behind rich savoury flavour that makes the sauce so special!

Roux – Add butter and let it melt, then sprinkle the flour across the surface and mix it in. It will look like thoroughly unappetising sludge – have faith! 🙂
Beef stock – While stirring the sludge in the pan, pour in half the beef stock, then keep mixing until the sludge dissolves – the liquid will become a very thick gravy.

Sauce thickness – Here’s how it looks at this stage. Very thick!
Simmer mushrooms – Then pour the remaining beef stock in, plus the water, tomato paste, salt and pepper. Stir to combine (it should be quite thin and watery) then add the mushrooms. Simmer for 10 minutes. During this time, the mushrooms will cook and the liquid will reduce and thicken into a gravy.

Add chicken – Once the sauce has thickened, add the chopped chicken and any accumulated chicken juices.
Thicken – Simmer for another 2 – 3 minutes until the gravy thickens slightly but remains saucy. However thick or saucy it is now is how it will be inside the pie once baked. Goal thickness – when you drag a spoon across the base of the pan, the path should briefly hold before the liquid flows back over it (like pictured above).
PIPING THE DUCHESS POTATO TOPPING

Fill pan – Pour the filling into a 6 – 8 cup / 1.5 – 2 litre pan. You could put it in individual heatproof pie dishes or ramekins. Smooth the surface to create a flat bed for the Duchess Potatoes.Note: Unlike with Cottage Pie and Shepherd’s Pie, there’s no need to wait until the filling cools and firms up before topping with mash, you can proceed while the filling is still hot.
Pipe mashed potato topping – Fill a piping bag fitted with a star tip with hot creamy mashed potato, then pipe mounds across the surface in any pattern you want. My swirls have a ~ 4cm/1.6″ base and are about 4cm / 1.4″ tall.No piping bag? No worries! Just snip off the corner of a ziplock bag and pipe smooth mounds. Else, spoon little lumps all over the surface (try to give them height!) or do a regular Cottage Pie topping (spread mash, rough up with fork).

Little blobs – Use the remaining mash to pipe little swirls or blobs to fill gaps. I do this randomly – neatness isn’t the goal, I love the rustic, uneven look. Plus, everybody loves Duchess Potatoes, so squeeze in as many as you can!
Drizzle and sprinkle – Drizzle the butter all over, then sprinkle with parmesan.
BAKING

Bake for 30 minutes until the potatoes are tinged with gold and lightly crispy, and it’s bubbling around the edges. Note to self: If your pan is rather full (like mine), put a tray on the floor of the oven to catch drips!
Rest for 5 minutes, just to let it stabilise a bit before serving (if you serve it straight out of the oven, it’s a bit of sloppy mess!). And if you’re feeling really fancy, sprinkle with a pinch of parsley for a dusting of green freshness.
HOW GOOD DOES THAT LOOK!!! And just wait until you taste it!


Use a large spatula or serving spoon so you can get a good amount of pie filling and potato topping together when serving. The Duchess Potatoes actually holds together quite well when scooped out.
Watch How To Make It
Now. It’s time for you to come clean.
Be honest.
You want to pick off all the Duchess Potatoes and run away with them too, right? 😈 Don’t leave me hanging! – Nagi x
Hungry for more? Subscribe to my newsletter and follow along on Facebook, Pinterest and Instagram for all of the latest updates.
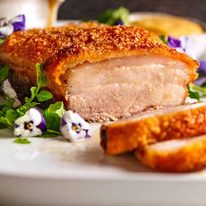
Slow-Roasted Crispy Pork Belly
Ingredients
- 1kg / 2 lb pork belly with skin on , NOT SCORED. Look for 3 – 3.5cm / 1.2 – 1.6" thick, even thickness with flat, unwrinkled skin, preferably not vac-packed (Note 1)
- 1 1/2 tsp olive oil , divided
- 1/2 tsp fennel powder / ground fennel seeds , optional, Note 3
- 1 tsp salt , cooking/kosher salt (or 7/8 tsp table salt), divided
- 1/4 tsp black pepper
For serving (as pictured in post):
- Apple Sauce
- Vermouth Jus
- Cauliflower Puree , (Note 2)
- See in post for more Sauce options
Instructions
- Dry skin overnight: Place pork belly on a plate. Pat skin dry with paper towels. Leave uncovered in fridge overnight to dry out the skin. (If you don't have time, pat the skin dry as best you can).
- Preheat oven to 140°C/285°F (120°C fan).
- Season flesh: Drizzle flesh (only) with 1 tsp oil. Sprinkle over 1/2 tsp salt, the pepper and fennel powder. Rub all over the flesh, including on the sides, being sure you get right into all the cracks and crevices.
- Wrap in foil: Place 2 pieces of foil on a work surface. Put the belly in middle of foil, skin side up. Fold the sides in to enclose the belly, forming an open box, pinching corners to seal tightly and make it as snug as possible. Place meat on a tray.
- Season skin: Pat skin dry with paper towels. Rub with 1/2 tsp oil then sprinkle remaining 1/2 tsp salt evenly all over the skin surface, from edge to edge.
- Slow roast 2 1/2 hours: Place in the oven and roast for 2 1/2 hours. After 1 1/2 hours, remove and tighten the foil (pork will have shrunk), and continue cooking. This keeps the pork fat level up as high as possible, and the flesh protected so it stays moist.
- Increase heat: Remove pork from oven, then increase heat to 240°C/465°F (all oven types).
- Level pork: Remove pork from foil and place on a rack set over a tray (using rack is best, but optional). Use scrunched up balls of foil stuffed under pork to prop up so the skin surface is as level and horizontal as possible (see photos in post).
- 30 minutes on high heat! Place the pork back in the oven for 30 minutes, rotating after 15 minutes as needed, until the crackling is deep golden, puffy and crispy all over. If some patches are browning faster, protect with foil patches. ⚠️ Open oven with care as it will be smokey – open your windows!
- Rest 10 minutes: Remove pork from oven. Rest for 10 minutes before slicing.
- Serving: Slice into 2cm / ⅘"-thick slices using a serrated knife. Pictured in post with Apple Sauce and Vermouth Jus, with a side of Cauliflower Puree (Note 2)! See directions in post for how to plate it up as pictured (fine dining style!), as well as a list of more sauce options.
Recipe Notes:
Nutrition Information:
Life Of Jaffle
My first dog park…..

….and my first Tres Leches cake!!
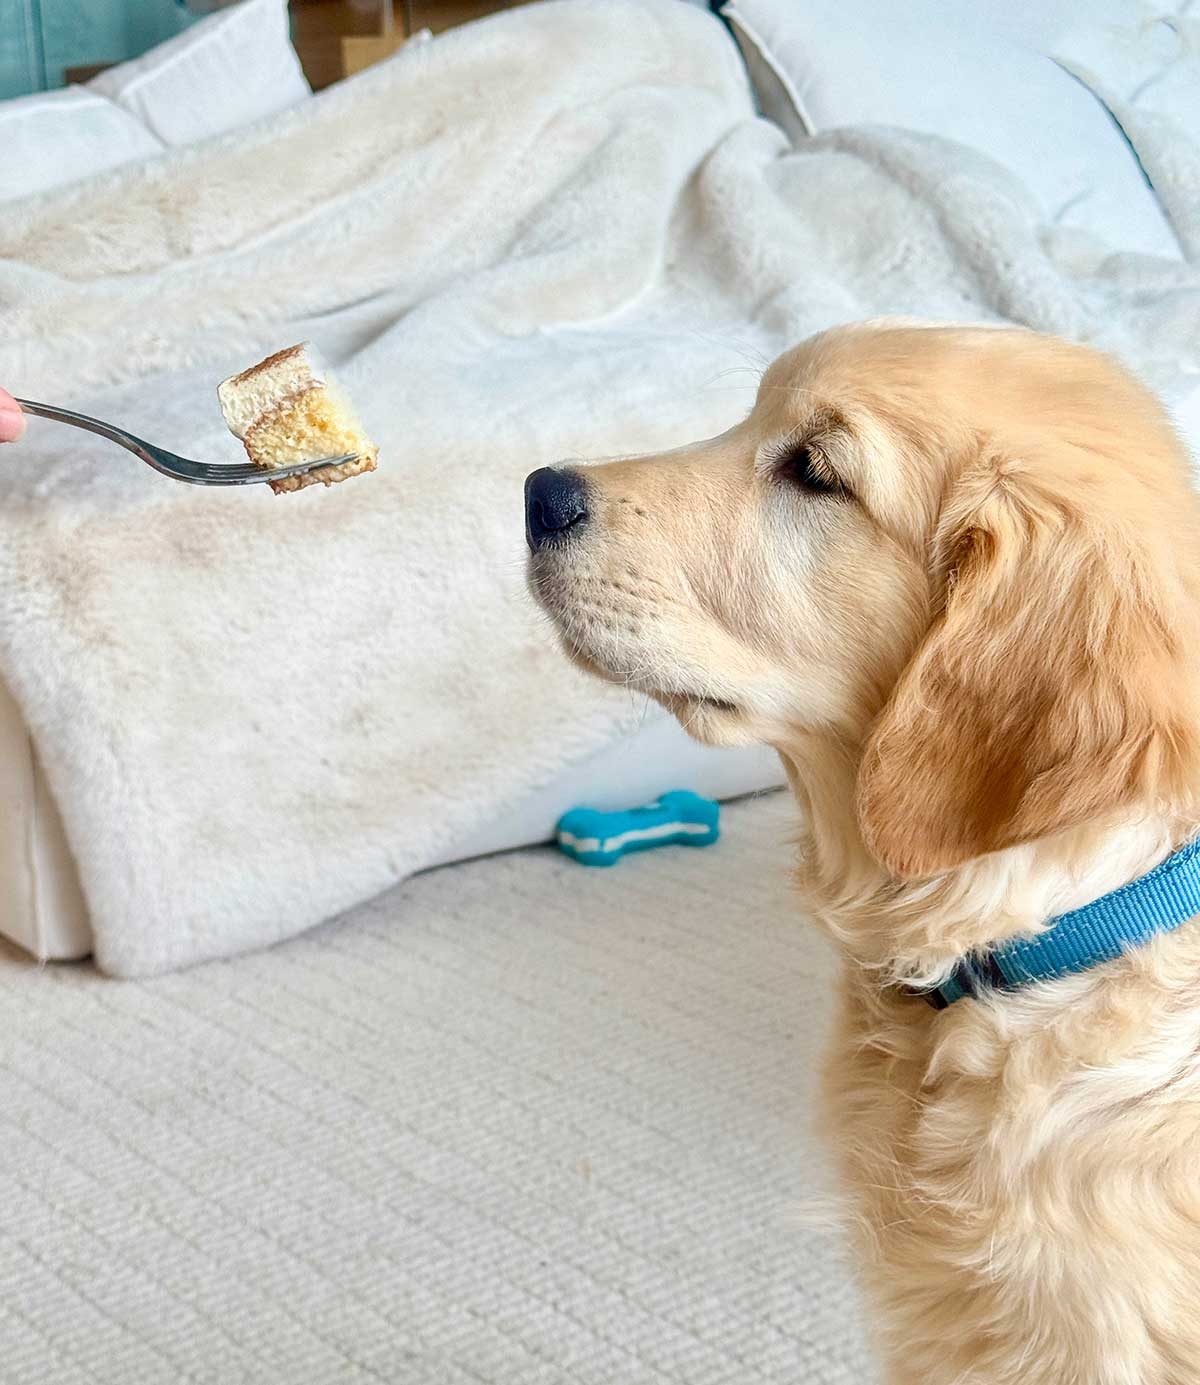
It is hard to know which one he enjoyed more!
I am an accordion
This is the first item content
This is the second item content
Test: Info box
This is the info box
There is some good information
Good information 1
Good information 2
3
Test: Nagi’s notes
Nagi's Notes


Some beautiful notes



This looks very delicious!!